My photo
Being a modeller for quite a few years now, I decided to explore the endless possibilities that the world (through internet) offers, and come up with a series of ways of building, modelling and painting fast (but not hastily), to create the worlds I was seeing in history books since I was little. . .If you care to join me. . . This is the place to be! And, I promise you to find the way (or ways)!!
Showing posts with label Mold making. Show all posts

Friday, 22 February 2013

Making a foxhole - Part 1

Hi everyone!

I'd like to thank you for your help regarding the info I was seeking about the diameters of pennies and cents throughout the world. With your help, I gathered all the info I needed and I decided to make some foxholes with a 22mm width, in order to fit every possible penny of the world!

Below you will see two photos of the basic elements I am intending to use for my foxhole. A piece of a vinyl tile, a piece of 3mm foamcore paper and a piece of insulating foam. 


At this hour, these pieces have been glued and some strips of kitchen paper are on them, waiting to dry for the next step, as you see below.


Stay tuned for the second part which will follow. 

Have a great Friday night everyone!
T.

Thursday, 21 February 2013

Penny Diameter -‏ for a mold.


Good afternoon L&D!


Hope you are all well. 

During these days, I've been reading the Fighting Wessex Wyvers book, written by Patrick Delaforce. What I noticed (among other things and aspects of course) is that, soldiers whilst fighting and refighting their days through Normandy and other battlefields, they were constantly digging foxholes for their protection. Since this was the 'staple' element of an occupied position, I came up with the idea of making some foxholes for my little men, and perhaps making some molds for multiple copies both for me and for you in case you are interested in buying some.

Since I want to make things right and not amending them afterwards (I am a rather tempered person - it must derive from my origin), I thought that I should ask you about your country's currency penny/cent diameter. If this seems odd to you, wait till you get some terrain pieces, and your figures don't fit it... It's not very nice, trust me. Nowadays, every penny counts, and we should consider every aspect that might arise to a problem for us. ;-)

As you all know, I live in Greece, where, for the time being at least, we are still in the Euro currency. I know about the diameter of 1cent (15 mm) and 2cent pieces (18 mm). 

Could you please help me about your country's pennies? England's, Australia's, US, South Africa's and any other country's I may have missed??

Thank you in advance - you are the best! :-)

Have a great Thursday night everyone!

T.

Thursday, 10 January 2013

How to: Make Sandbags

Hi everyone!

Hope that Thursday found you all well.

After a public outcry, and a request from a fellow modeller to make some sandbags pieces for him, I give you the 'Sandbags Tutorial'. Here goes. 

Step 1.
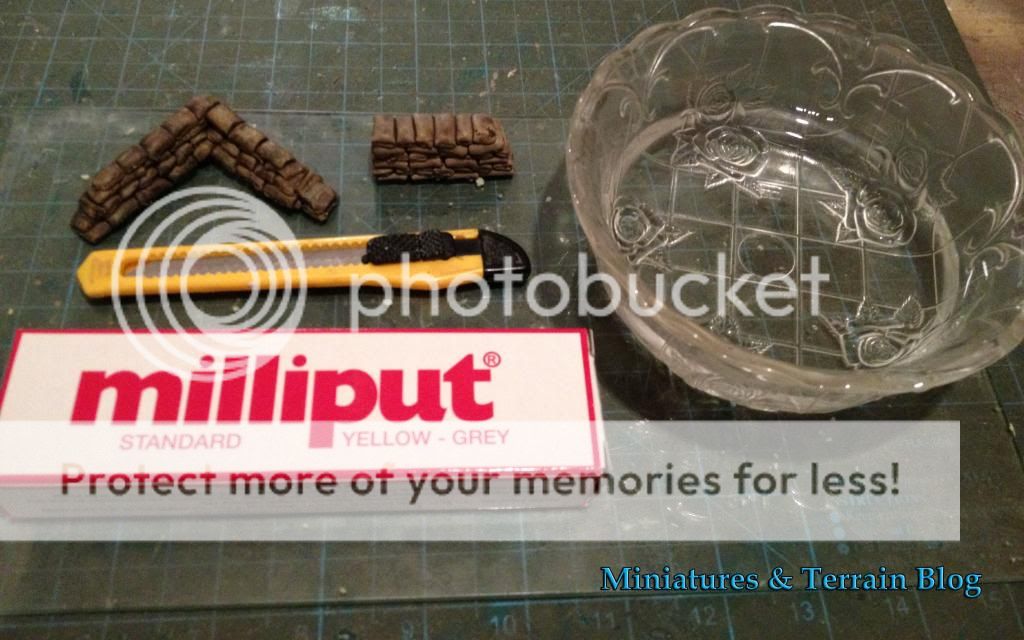
In order to make this thing right, you will need:
- Milliput putty (yellow & grey)
- A modelling knife
- A piece of glass (it helps getting out the ready pieces easily)
- Some water (it will help you, because Milliput tends to get sticky when handled). It's good to have your hands wet all the time.


Step 2.
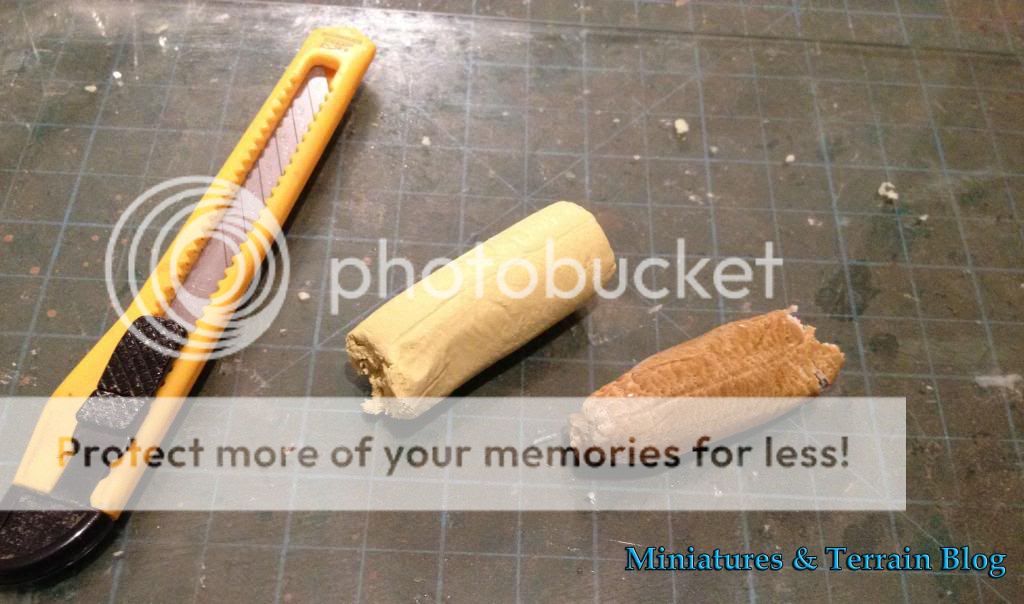
Milliput comes in two little 'sausages'. Take some equal quantities of them and start mixing them. Imagine that you are making burgers - it helps! 


Step 3.
Make some thin 'sausages' of the mixed Milliput product (0,4 cm diameter) and then start cutting little pieces of 1cm length, with the modelling knife. Take every piece - yes, every piece, and bend it with your fingers on its edges, in order to represent a sandbag as it is in reality. It is a tedious task and rather time consuming, but it's worth it. 


Step 4.
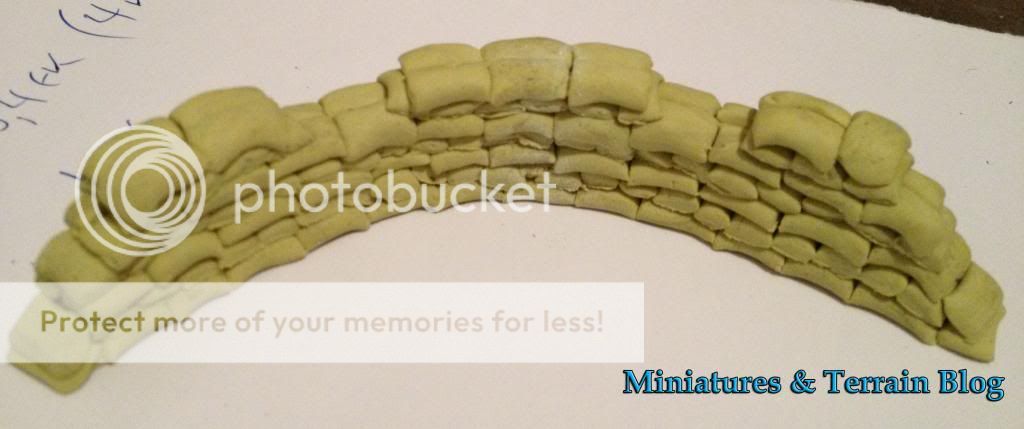
While doing that, start piling them up, one next to another as the photo suggests.


Step 5.
Proceed with the same procedure by placing the next layer of them vertically (I know  my English is crap, but the photo will help you understand what I mean).


Step 6.
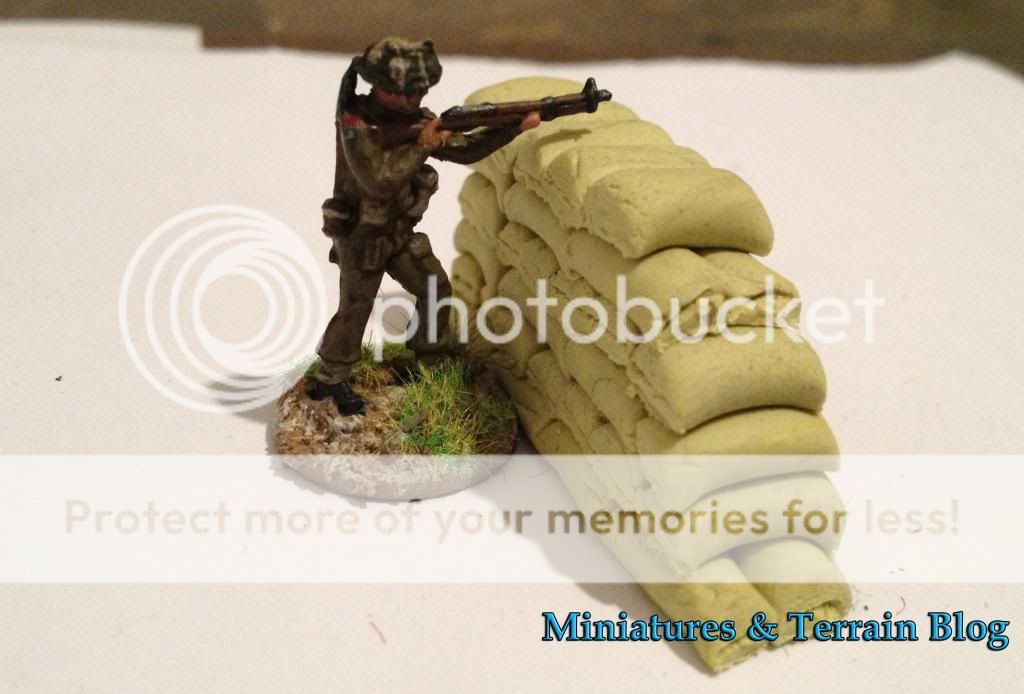
Be patient. Come on, carry on - on the double! See where it leads to? If you want to add some extra detail, take the sharp edge of your modelling knife and make round 'cuts' on the sandbags' edges.


Easy wasn't it? The basic thing is to keep your hands humid/wet for to be able to adjust every little piece accordingly. It helped me! 

See some additional photos of the finished pieces (one for a building and one curved one).


Have a great Thursday night everyone! :-)
T.


Tuesday, 11 December 2012

How to: make a WW1 French memorial

Hope you are all well!!!

No time for a long post - in terms of writing - plenty of things to do boys and girls.... :-)

Trust the photos (and the post's title) below are self explanatory. If not, mail me. I'll be more than happy to help you! :-)


Have a great Tuesday night everyone!! 
T.

Monday, 26 November 2012

You give me a button, I do the rest.

Hi everyone,

After a peaceful and quiet weekend, Monday has come and with it, comes the result of my efforts to make a new terrain piece with the help of my Hirst Arts molds and a bit of plaster (and not only...).

These molds are very handy, even if they are destined to be used for Medieval projects (castles etc.) and similar terrain pieces. As I've already told you in one of my previous posts, I like to explore Normandy towns with the help of Google Map explorer. While doing so, I came up with the idea of making a small terrain piece that could be used and be put between two buildings located in a street's corner. I decided to go and make a small town drinking fountain. I didn't know if it would be correct in terms of historical accuracy (in the mid 40's), but, I thought that it would add a nice form of variety to my never ending town-building project.

With this idea in mind for quite some days now I thought about the materials I had in hand, and what I could make out of them. I used some basic rectangular blocks, made from plaster (Hirst Arts), a small button (yes, button), a small lion-head made from plastic (I had it in my drawers for years), a piece of a vinyl tile and a piece of some Slater's plasticard (PVA glue, gesso and paints as well).

Below you will see the result of my 'block' molding process.


Now, you see the fountain piece, with it's button glued on top of it! :-)


And now you see the finished piece. It was painted grey, and the moldiness is thin strips of Vallejo's Russian Uniform.

On its own:


And between the big houses' walls:


Providing cover to some advancing Brits. :-)


I am preparing one more terrain piece, I hope to finish it soon (I am looking for a WW1 French Infantry man figure (standing position) - preferably in 28mm scale - any suggestions???).

I hope you like it.
T.


P.S: Revell has announced to re-release an old but very good set of figs, on the first quarter of 2013. I am talking about the old Australian Infantry (#2501) set, if you know it, which has a lot of useful figs, that I can use for my 43rd wyvers (with the help of a modelling knife and some super glue - for some minor conversion works - i.e helmets). It's production has been stopped for quite some years now, and during all this time the choices for some nice British figures (in plastic) were not very many - even though there has been an improvement recently, with new sets emerging. So, if you are interested, go to your local hobby store in a few months (03/2013) and get as many sets as you can (you never know, when they'd be done for good for a second time)! :-)

Have a good Monday night everyone!