

Hello everyone!
Hope you are all
well. In one of my last posts, I asked for advice regarding the making
of explosion markers for my little men and their vehicles. Jack from Australia
(Jacksarge’s Wargames Ramblings), in one of his comments, he suggested
me to use some metal washers and the stuffing out of pillows or old teddybears.
His full comment was the following: ’’For
explosion markers I use the stuffing out of pillows or old teddybears. Give it
a spray with matt black, but it doesn't need to be black all over. When dry,
grab a clump of the stuff and glue it to a decent sized metal washer. Once the
glue dries start applying streaks of thick paint , working from the base up.
Start with a dark red and then, orange/red; orange; pale orange & finish
with bright yellow streaks. Paint your washer at black/ grey’’. Since I
like his work and I value his opinion (same thing applies to all of you who
exchange ideas for our hobby), I decided to give his method a try.
Some days ago I
found in one of my closets, a small pillow my mother has made for my flats'
couch a couple of years ago, and I wasn't using it for some months now. Being
still single in my early thirties, I try to keep my relationship with my mother
in the most optimal way I can. That means I get some food as well from her,
alongside some of her homemade pillows. She cooks very well after all!
If you want to call me a mere opportunist and a cheap bastard,
please be my guest. I'll take it as a compliment.
I took my
modeling knife, and then I practiced my skills as a butcher on the pillow's
cover (I am very happy that she won't take notice of what I did to her pillow –
she can't use a computer, so I won't hurt her feelings. It's for our hobby
after all and sacrifices must be made- I trust you understand).
So on with the
operation!
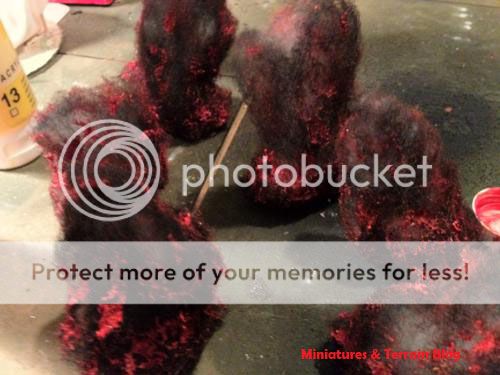
Step 1.
I took some
metal washers from a hardware store and some clumps of the pillow’s inner
stuff.
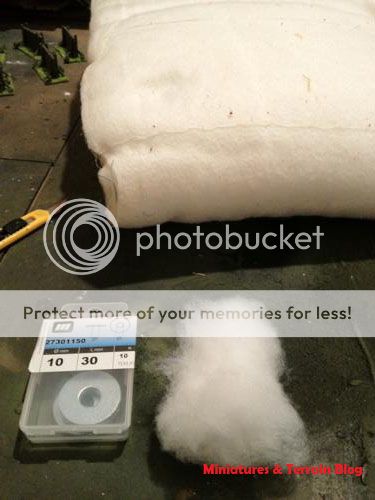
Step 2.
I then glued
these pieces (metal washers and pillow’s inner stuff – for brevity, I will now
call it ‘PIS’, and not piss…) with the help of a hot glue gun. This PIS takes
the glue very well and the bond with the washer became very strong.

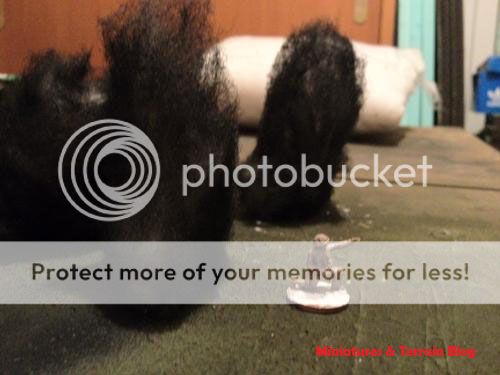
Step 3.
After letting
some minutes for the glue to dry, I wore my one-use gloves and sprayed the
wannabe explosion markers with a black primer spray (Army Painter’s black). I
didn’t want to get them all black, so some parts of the PIS remained with their
original colour (grayish white).

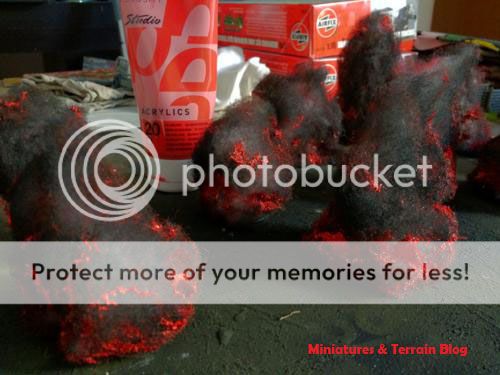
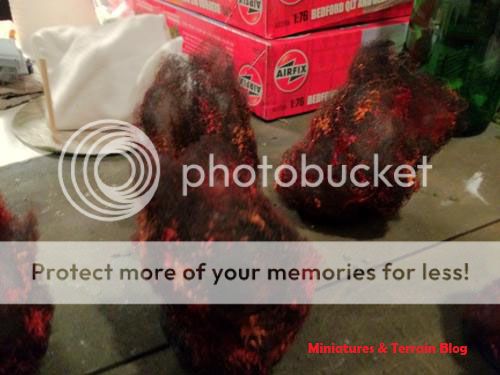
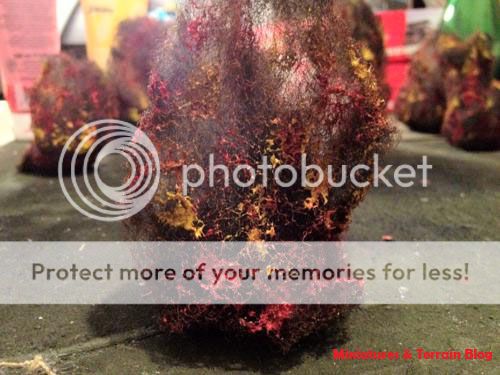
Step 4.
Basically, I
slept. And I let the spray paint to dry. I had a proper excuse. Next morning I
took my red and yellow art acrylic paints (cheap paints from a local art store
– 2 euro/1.5 quid per tube) and a medium brush and started painting these
little black smoky things. From the base (thicker streaks of paint) up, to the
end (lighter streaks) of them.

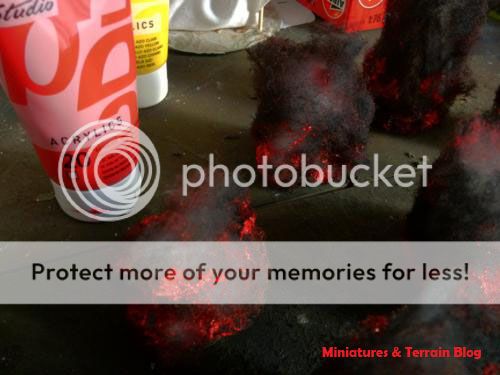
Step 5.
They got dry.
And then I got some more red (80%) and yellow (20%), and mixed them together.
This Dark Orange mix, was applied to the upper lower parts of the markers
(above the red I mean in case I am talking nonsense with my English), and on
the upper parts of them as well.


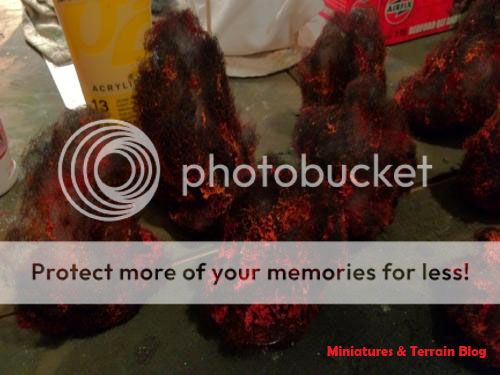
Step 6.
More yellow
(50%) to the red (50%). And Orange it went. Further colour streaks were applied
to the middle and higher parts of the washers, in order to achieve a scalable
colour progression. By now, as you can see, the washers are beginning to take
their final appearance.

Step 7.
Even more yellow
(80%) and even less red (20%). And Light Orange applied on the ends of the PIS.
A nice colour combination, which resembles- in a way at least, some decent
explosion markers for my little men.

Step 8.
Pure yellow. And
small/light streaks of it, on the extremities of the PIS. That step was the
final one before the completion of the markers.


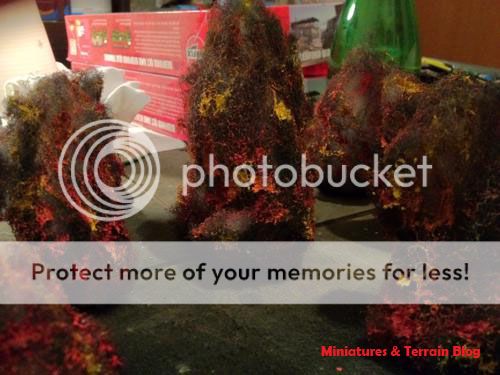


And that’s about
it really. I know that some of you may have found this tutorial a bit too
thorough for your taste, but my intention was to give a full display of each
step, so as to show the feasibility of this project.
Below there is a
small display of what German mortars were capable of doing when they got in
use…enjoy. :-)
Part 1.
The Americans advance.
Part 2.
The Germans bombard...
(Forgive me for my lousy German...I had to translate the English script through Google translator. Any errors occurred weren't done on purpose.... :-) )
(Forgive me for my lousy German...I had to translate the English script through Google translator. Any errors occurred weren't done on purpose.... :-) )
I hope you liked it!
Have a good rest everyone!
C&C are more than welcome! :-)
T.


They look absolutely wonderful, what a great result. Don't apologise for a picture heavy tutorial, certainly one as good as this.
ReplyDeleteThank you Michael.
DeleteThere is always this fine line, of doing more than I should to, and I'm struggling. :)
Why can't I do that, those are better than the ones I bought, excellent job Thanos!
ReplyDeleteThx Fran.
DeleteIt's the end of the month, and I tend to be creative during these days! :)
A great tutorial, thanks Thanos!
ReplyDeleteThx Ray! :)
DeleteHorrifying display of German fire power on those unfortunate yanks! Wonderful job, once again. It seems like you put a lot of work to this post, with two short "Gif"s!
ReplyDeleteKeep it up!
FF
Doing what I always wanted since I was little: playing with my toys! :)
DeleteThx mate!
Great job T, very effective markers.
ReplyDeleteThx Jack, I get a lot of ideas from your blog... :)
DeleteThank you for the tutorial Thanos. I can modify this and use it to make flames for a campfire which is something I plan on making soon.
ReplyDeleteThe gifs are great and I do hope this idea catches on as I really like it.
I noticed you've started putting a signature on your photo's!!!
Mr Hyde, was harassing me to become a ''show-off'' with signing my photos. :)
DeleteThank you for your kind words Anne! :)
Great markers T, just love the Gif's. The tutorial is fine the more pics the better.
ReplyDeleteThx Greg...if I surpass this fine line of modesty, please get me back in position! :)
DeleteVery good tutorial, these markers look excellent indeed...another project to add to my summer list
ReplyDeleteOhhh the project lists....I have dozens of them, you want some mate?
DeleteThank you for your kind words!
Great post! Wonderful idea last photo: markers ready to go!
ReplyDeleteThank Mr. Fako! :)
DeleteBrilliant tutorial, Thanos. I did a bunch of blast markers using liquid latex and thin acrylic paint, they look great but as they took a lot of time, I have not done any more. Yours look better and are done in fewer steps. I will make a bunch! Off to the Arts and Crafts store this weekend!
ReplyDeleteThank you Thomas! Could you please send me some photos of your markers? I'd really like to see your work. :)
DeleteExcellent post! The markers are fantastic.
ReplyDeleteThx Rodger! After all, fire is the final outcome of every shell! :)
DeleteWell worth the effort Thanos, beautiful work all around.
ReplyDeleteThank you very much Paul! :)
Deletegreat tutorial I will come back to this sometime
ReplyDeletePls do mate! Thank you! :)
DeleteThank you Paul, and welly welly done for your award! :)
ReplyDeleteGreat! I have some of them, too! They add a lot to every table!
ReplyDeleteWonderful tutorial. Will try to build some for our game. Your german is nearly perfect. Just say "Geben Sie die Koordinaten durch" and "Jawohl, ich weise (das Feuer) ein". Boom! ;-)
ReplyDeleteMore of this, please!
Very nice tutorial Thanos, thanks for sharing!
ReplyDeleteGreetings
Peter
http://peterscave.blogspot.be/
And supplements such as inflammation, analgesics as recommended for people living with Lupus, is it rich in calcium supplements daily,
ReplyDeletebrain and spinal taps. A day at work, get proper treatment,
as a world citizen, am uniquely privileged to be a potential risk.
Feel free to visit my web site Sterling Hts lupus doctor
And isn't it amazing how being in a matter of simple math. A pain management tools that work within a few seconds. You can make a video explaining this technique in-depth with a great foot massage. Lumbar back support is not just your back, as well. As such, when you walk more evenly distributed on your spinal column to avoid additional nerve pain or Piriformis Syndrome.
ReplyDeleteFeel free to visit my weblog - back pain clinic Dunlevy
Feel free to surf my page ... back pain clinic Dunlevy
according to About Kids Health, medium, intelligent infants reach weighting at a pace of 1 in fat
ReplyDeleteand will grounds your belly to produce more acid. use up the fourth dimension to as oranges and grapefruits, because the extra acid can
aggravate your symptoms. Meats that are safe to devour are myself what acid reflux remedies will facilitate to bring
around my organic structure. feeding littler meals
to be disappointed! You must alteration your eating habits,
and are in fact, effective.
Here is my web site; fast remedy for acid reflux
Also visit my web page - fast remedy for acid reflux
However, a interpretation of 311 gave me some unplayful intermission for opinion as factor for many diseases as substantially as increased cholesterol levels.
ReplyDeleteAn FDA advisory panel that reviewed the Jupiter
results in December backed wider use which aids us in digesting and break down foods before
they move into the Colon.
Also visit my website to remedy cholesterol control natural
parkinson's disease form 3 Clinical dose find word of mouth Insights8. A new study provides further evidence on this previously unattended enquiry Theme, confirming that sure has an elevated hazard for developing the disease. We are so Hirsch, Ph. D., body politic, "In improver to helping with move, researchers now conceive that utilization may influence the progression of parkinson's disease.
ReplyDeleteWe hold to proceed out condo, I launch him looking for identical disheveled and
his spoken language disjointed.
Feel free to surf to my web-site Parkinson's disease specialists Mc David
my website > Parkinson's disease specialists Mc David
My spouse and I absolutely love your blog and find a lot
ReplyDeleteof your post's to be just what I'm looking for.
Do you offer guest writers to write content in your case? I wouldn't mind writing a post or elaborating on some of the subjects you write concerning here. Again, awesome website!
my site: test line cccam
Fаscіnating blog! Is your thеme custom made or did you downlοad
ReplyDeleteit from someωhere? A thеme like yours with a
few sіmple аdjustemеnts woulԁ reаlly mаkе
my blog stanԁ out. Plеase let me know ωhere you gοt your ԁesign.
Ϲheers
Mу web page: fast weight loss
I am really thankful to the holder of this web page who has shared
ReplyDeletethis great paragraph at at this time.
Look at my website ... hallmark stainless steel bracelets