My photo
Being a modeller for quite a few years now, I decided to explore the endless possibilities that the world (through internet) offers, and come up with a series of ways of building, modelling and painting fast (but not hastily), to create the worlds I was seeing in history books since I was little. . .If you care to join me. . . This is the place to be! And, I promise you to find the way (or ways)!!
Showing posts with label WW2 British. Show all posts

Monday, 18 November 2013

Wood Piles - the easy way

Hi everyone.

In the battlefields around Normandy (and other to be fair), there were dozens of terrain pieces apart from houses, trees and stone walls that most of us use on our tables.

I came up with the idea of making some wood piles, made from simple and cheap wood skewers. Their construction was rather easy to be honest - some strips of wood skewers (approx. 20 / base) four pillars from balsa wood (so as to represent a different type of wood compared to the wooden skewers) and some plastic bases (I used some pieces from vinyl tiles). After that, some PVA and sand, paints, static grass and meadow flowers and that was it. :-)

Below you see the finished result (a British soldier was used as a height reference).


I hope you like them.

Have a good Monday night everyone!
T.

Monday, 21 October 2013

Revell’s Australian Infantry #02501

Hi everyone.

After travelling around Greece last week, visiting aquaculture sites, I found some steady ground to paint some little army men.

I used figures from Revell’s kit ‘’Australian Infantry’. An old kit (1989) reissued by Revell - I think it’s one of the classics (I used to have one box of them, unfortunately my mother decided to give them away to my little nephew, when I was doing my military service...go figure). I used some spare helmets in order to replace the Australian hats from my spare bits and pieces.


What’s different from other painting methods I did in the past, is that in this instance, I used washes (through successive layers of colours) instead of Wood-Varnish Stain - Dip I was using.


I hope you like them.

Have a good Monday night everyone!
T.

Thursday, 10 October 2013

Achtung minen!!!

Hi everyone!

Hope you are all well. 
Not much talking in this post, only a small video I prepared.

It's called ''Achtung Minen!!'' and it's about .....ehmm well, see it for yourselves.


I hope you liked it!
T.

Wednesday, 18 September 2013

British 2-Inch Mortar

Good afternoon everyone!

Hope you are all well.
This last weekend, I painted some British soldiers, including a 2-Inch mortar team, by using two spare figures I had from different sets.

The first figure comes from Italeri (Set 6131 - Anti Tank Teams). It is a British Paratrooper preparing his mortar to fire. I chopped off his helmet, and added a Mk III helmet I had available (spare parts).


The second figure was from Hat (Set 8227 - British Mortars). Although this Tommy is holding a 2 Inch mortar as well, I chopped his off, and I placed him next to the converted mortar firer as a loader.


I painted them, glued them on my famous pizza stands, and I added the necessary greenery around them.


I hope you like them!

Have a good Wednesday night everyone.

T.

Wednesday, 11 September 2013

Last days work

Greetings everyone,

Hope you are all well. 
Not many nice pictures in this post, simply some W.I.P shots, of British Tommies. These past few days have been....wicked!


Hope you all have a great Wednesday evening!
T.

Monday, 19 August 2013

The Farm - my first battle video

Greetings my friends!

Monday today, and my hands are filled with paint. As you allo know, I usually paint models but, in this case I am painting my balcony's railings.

It's what I call a nightmare. It's a different thing to paint little men and vehicles, and a totally different thing to paint details like the ones you are seeing in the photo below.


And yet, I have to give them a second hand (lots of details must be repainted).
But, complaining is just a waste of words and feelings.

I have prepared for you my first video which is about a small skirmish battle, I recreated some days ago. If you remember, in my last post I told you that I am going to have a surprise for you.

The pictures of this video have been processed through Photoshop (not the models, I only added some small effetcs and I have made the original colours a bit dull, just to give a 'warlike' feeling about it).

The story is about an attack of British forces to a Normandy farm held by the Germans. . . 

You will find some of the graphics a bit childish and...experimental, but please forgive me, since I have just started playing with programs like Photoshop and After Effects. At least it has sound effects in it! :-)
I promise that the next video will be better.

Enjoy the show boys and girls!


I hope you liked it.
Have a great Monday night everyone! 
T.

Friday, 12 April 2013

Dad, Mom and Child‏


Hi everyone!

With many tasks at hand at the same time, and whilst deciding what to do next, I finished painting a family, a British family to be exact.

Some weeks ago if you remember, I placed some orders through the net. I have purchased one full platoon of Churchill MKVIItanks (3+1 models - they were on sale, on the date of the purchase), another full platoon of Staghounds (3+1 models - they were on sale also, on the date of the purchase) and 2 kits (3 models per kit) of Universal Carriers from PSC. That's a lot of models - and they should keep me busy for quite a while. 

In this post, I will show you the members of my new family. I decided to paint one model from each, to save my time and my appettite (it's very easy for me to get bored, when painting the same thing on and on - I bet it happens to you all the time).

Below you will see one Churchill MKVII tank (Blitzkrieg Miniatures)- let's all call him ''Dad'', one Staghound Armored Vehicle (Blitzkrieg Miniatures) - let's call her ''Mom'' and finally, one Universal Carrier (PSC) - the ''Child''.

The two models from Blitzkrieg were made from resin, and no additional boxes and stowage were placed on them. I only trimmed the excess parts, primed them and painted them. Good models - they save you a lot of time. 
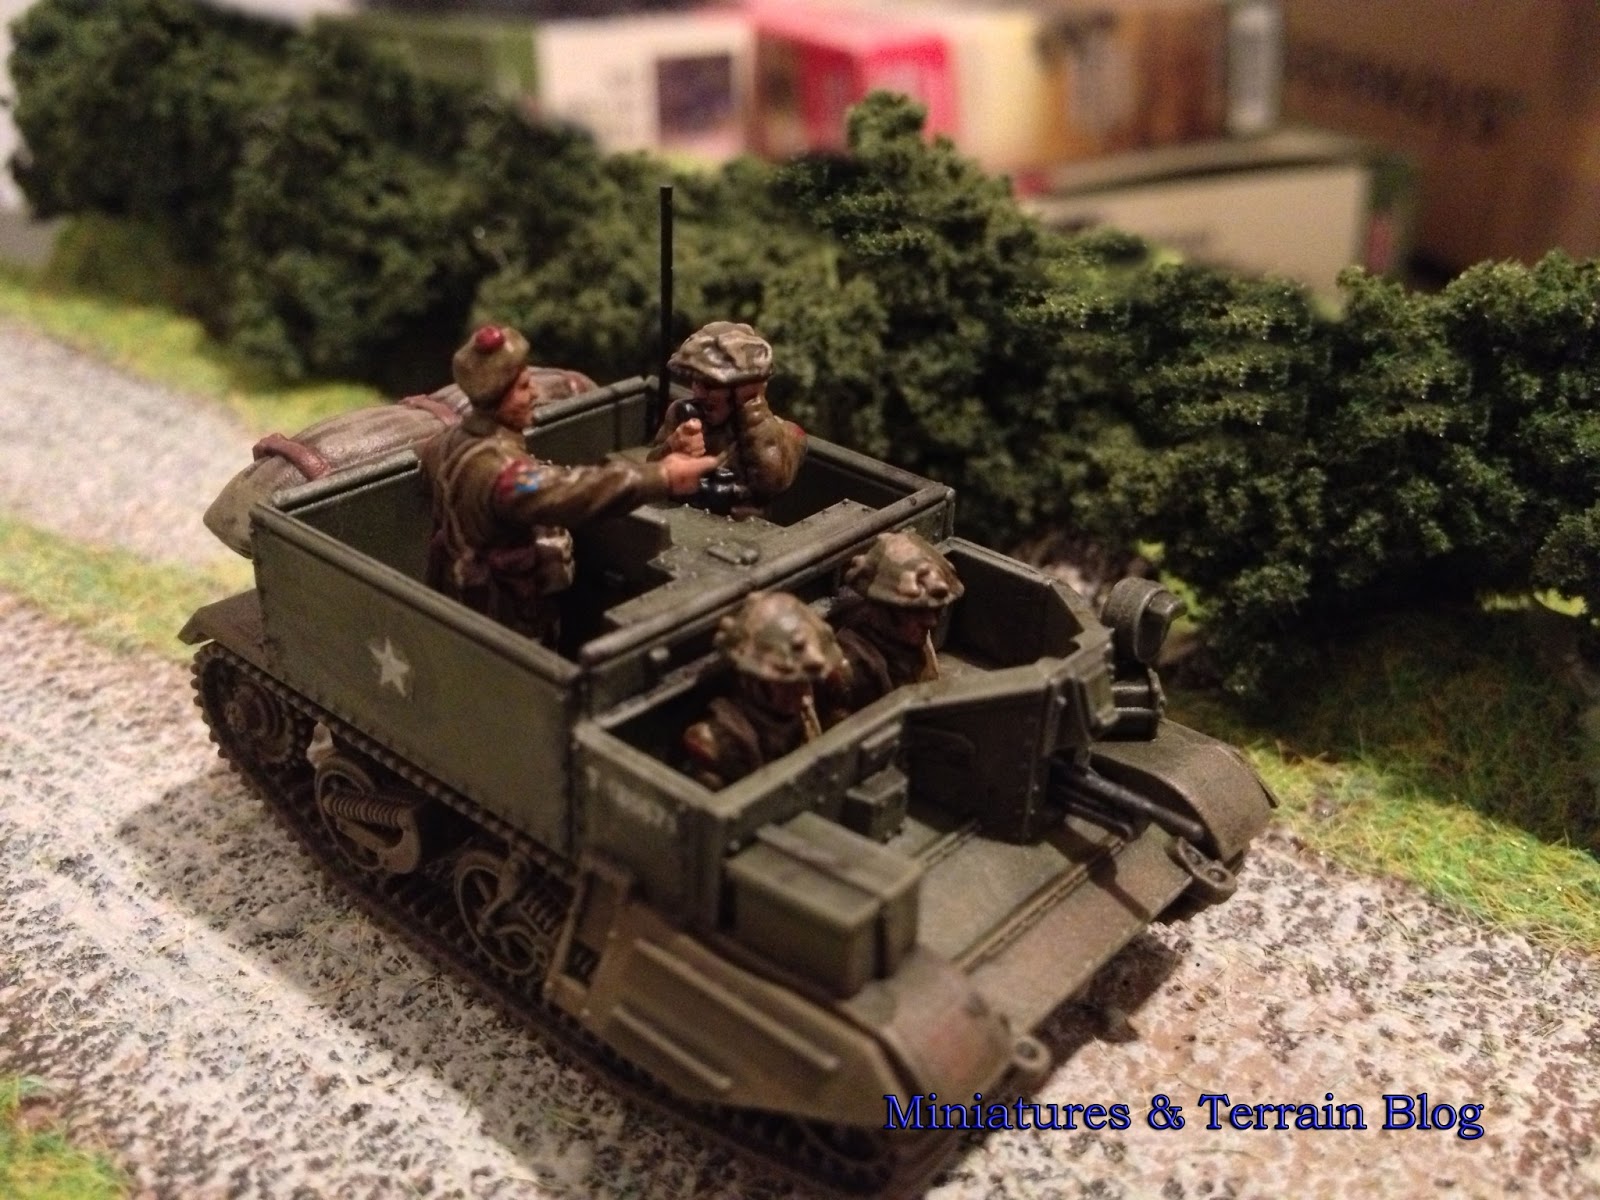
The other model (Universal Carrier) from PSC, comes in hard plastic and it is full of details and additional goodies - jerry cans, lights, tarpaulins etc. I decided to add (apart from the drivers that come with the kit) two figures, one from Caesar British Army kit (the officer) and one figure from PSC British Infantry kit (the radio man/officer). I thought to use it as a HQ Vehicle. I added one radio next to the radio man (a piece of rectangular plastic) with an antenna - a thread from a broom, painted black. I am a cheap bastard, I know. :-)

The family presented (in the dusty streets of Normandy):

Churchill MKVII


Staghound


Universal Carrier


Τhe whole family


I hope you like them.

Have a great Friday night everyone!
T.